THE BLOG IS HAVING TROUBLE WITH COMMENTS! SOMETIMES THEY DON’T GET PUBLISHED, AND WHEN THEY ARE I AM UNABLE TO REPLY TO THEM. IF THAT HAPPENS, JUST EMAIL ME AT stitchlore@gmail.com.

Looking for something specific? Check out the Topic Index, or the Search bar, just below, on the left.


Sorry about this problem!

SO.........WHAT ARE WE WORKING ON TODAY??

Friday, May 30, 2014

One way to make a ribbed shade

Ribs give a bit of support to flat romans, helping them fold neatly.
Ribs aren't foolproof; there are some fabrics that they just don't help at all; but they were great in these 3 linen shades with napped sateen lining.
There are different rib materials: plastic, metal, fiberglass; and many ways of using them. 
This is one way. 
The shade begins with the lining: pockets are sewn into the back side of napped sateen.  Since these shades are 86" long, we spaced the rows 8" apart.  The default spacing of 6" would've made way too many folds, all stacked up on top of each other.
The pockets are pressed downward, and the lining laid onto the prepared face fabric.  The gridded tabletop is indispensable for producing these shades. 
No matter how meticulously the pockets are sewn, you still need to go along each row with a straightedge and make sure the seams are as straight as possible.  The side hems are folded over the lining, but not yet sewn.
At the bottom, the hem is basted in place.  Yes, it could be pinned, but basting is better.
The vertical rows are marked for rings with purple disappearing pen, and ladder tape is run.  At the bottom, the row of rings above the hem are sewn, and the ladder tape pinned in place above the hem.  Note that the side rows of rings are not placed over the side hems, but just past the edge of the hems.
At the top, the topmost row of rings are sewn.  These are reverse mounted, so the grommet placement is marked with pencil.  The board line is marked allowing an extra 1/4".  The cutting line is marked, and the word "REVERSE" is lightly penciled in to help me remember not to staple the shade the regular way!!!  This step has saved me a lot of time :)  The ladder tape is stapled to the excess fabric for safekeeping.
Now for the Zen portion of the fabrication: sewing on the rings.  If the seams did not absolutely perfectly follow a straight line, it's ok, as long as you've marked perfectly for the rings.  The ring can go a smidgen above the seam or a hair into the pocket area.  The ribs will keep straight inside the pockets. 
When all rings are sewn, the shade goes to the sewing machine for the weight bar pocket- several steps that I forgot to photograph.  The shade is laid back out onto the table, the side hems opened up, and the ribs inserted into the pockets.
The side hems are folded back over, pressed lightly, and hand-sewn to the lining.  The weight bar is inserted and the pocket tacked shut.

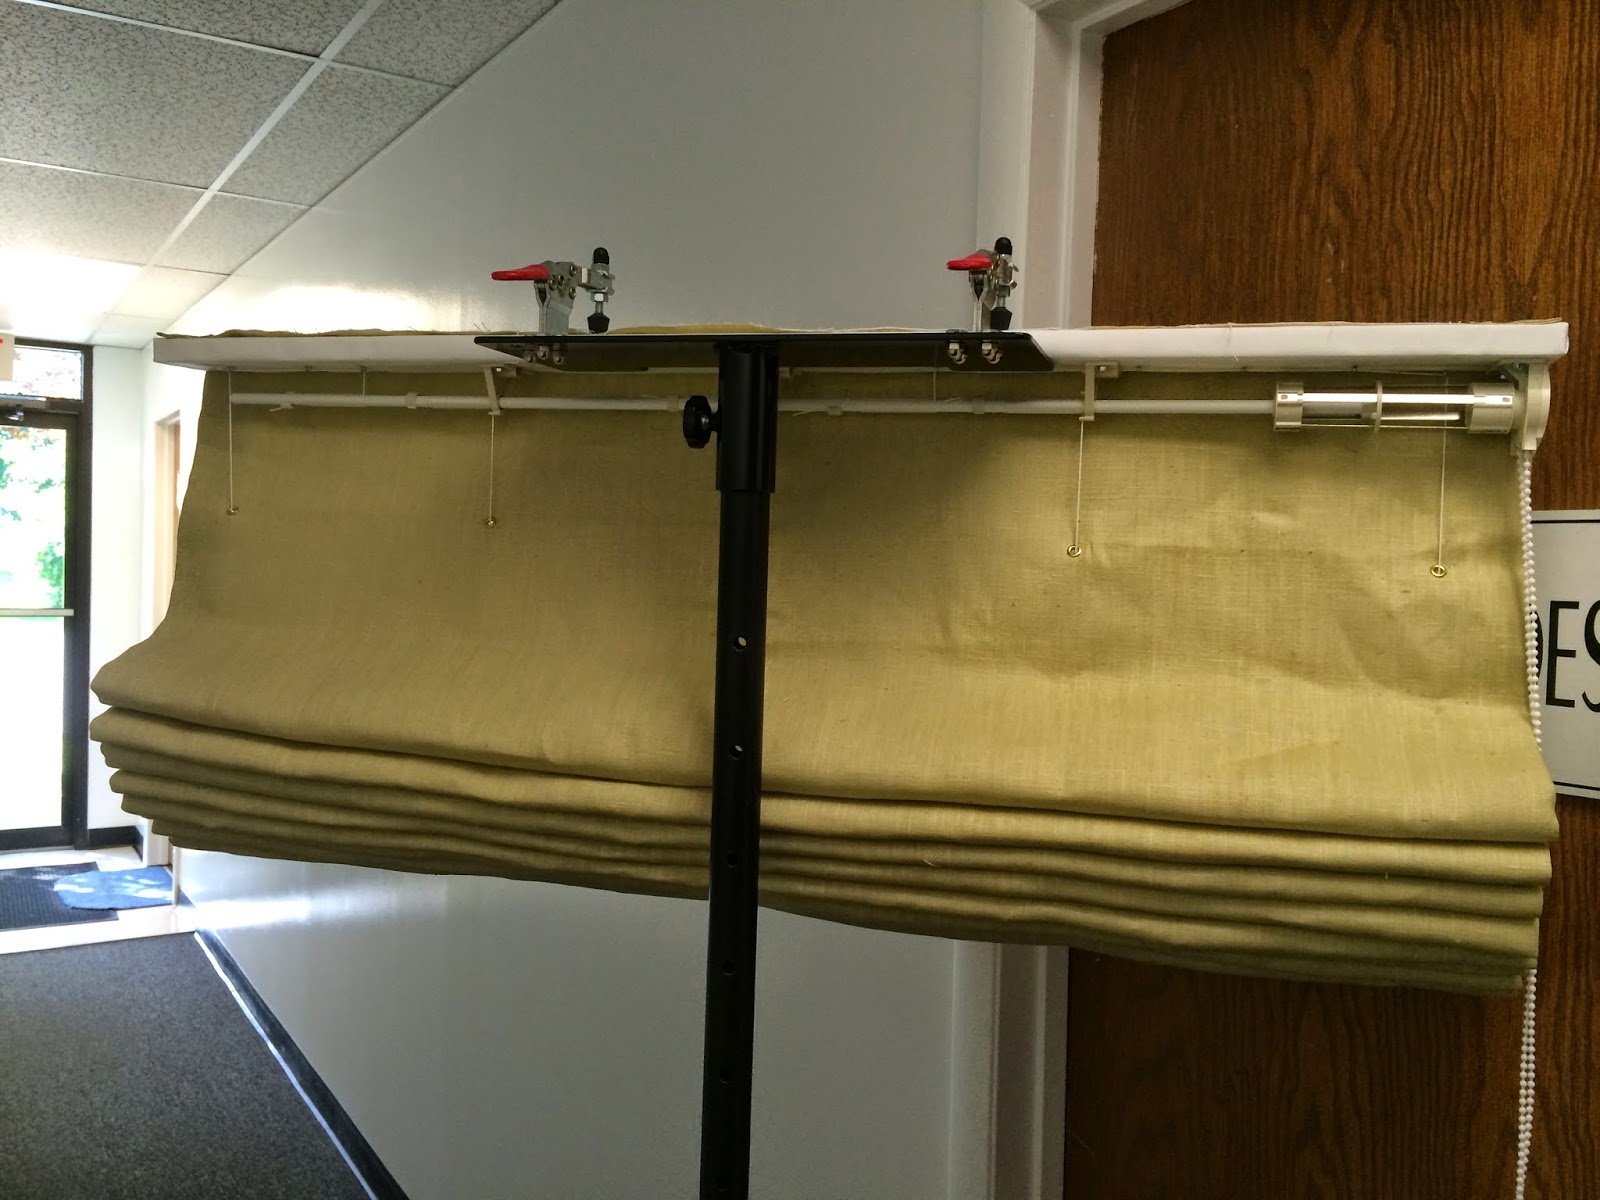
All it needs now are the grommets, and it's ready for the board!  After the lift mechanism is secured, the shade is strung and leveled; lastly the valance is attached and it's ready for packing up.


Monday, May 26, 2014

More special touches for sheer shades

We enjoy giving a little extra attention to sheer fabrics, whether for shades or panels.
We were pleased to admire this shade, for Nicole Gray of Suite Dream, for the week before installation day.
Ladder tape was not available in a color that blended with the fabric, so we dyed some ourselves.
To hide the weight bar pocket, one permanent fold is created at the bottom.  Everything else is hand-sewn.
  For this embroidered linen semi-sheer, also for Suite Dream, we created the matching weight bar tube pocket out of the selvedge.
The selvedge also make a perfect non-bulky board cover.

Thursday, May 22, 2014

Double-sided ribbed roman shade- at last!

I've been wanting to try making one of these for years.  A double-sided shade lifts from cords sandwiched in between two shades which fold up independently of each other.

At last the perfect opportunity arose: for Denise Wenacur's client, a basement space with a playroom and a gym, with a window between so the adults can see the children.  They wanted two shades, one in each room, but I thought I had an even better idea.
It worked perfectly.
From the gym you can operate the shade and see into the playroom.
 On the playroom side, you can see through the window the valance that hides the clutch and the grommets that allow the strings to lead up to the headrail.  The pleats fold up neatly thanks to the ribs inside.

Before making the client's shade, I needed to make more than a mockup- rather, a full size sample.  As I made it I thought of better ways to do it, so the final product isn't made quite like this one was.
Both shades have this in common: the ribs are secured in the side hems.  For the mockup, the ribs were tucked into the side hem which was secured with Sealah tape.  For the customer's shade, the side hems were hand-sewn.

 Twin stitches were made through both layers and provided a channel for the lift cord.
The actual shade was lined, with a sheer, to keep bulk to a minimum.  The lift cord was secured at the bottom, inside where the weight bar will be sewn.   An X-shaped stitch on the front side only created the channel for the lift cord, and when it was all assembled and hung, stab-stitches were made to hold the layers together.
On the playroom side the valance hides all the workings, and at the ends small flaps keep the underside of the board out of view.

Sunday, May 18, 2014

More mesh sheers

The hardest part of this job is juggling deadlines.  There are times when everything is due at once, and we have to produce and deliver without appearing to break a sweat!................ this said, by way of explanation where I've been for nearly two weeks.
Well, at least I have photos to show for some of our recent installations.  Here's the first.
These mesh sheer draperies for Kim Freeman were a delight to fabricate.


The fabric is actually a mesh within a mesh: in between the larger mesh that you can see is a web-like mesh of a super sheer material that's nearly invisible.  Kim had the excellent idea of using the selvedge as a band at the top.
We used 3" translucent buckram machine-sewn to the back at both edges.  (For iPhone users, note that this photo was taken with a 5S about 2" from the subject!)
To test the idea, first I made a mockup, and tried both two-finger and three-finger pinch pleats.  The three-finger pleat was the winner.
We were happy with how the buckram behaved except that we had to be super-careful to not let the mesh "walk" during the sewing and turn out looking slanted.
As with other sheers hemmed by hand, we've learned the hard way to pin with safety pins, not straight pins!

Tuesday, May 6, 2014

A problem-solving adventure

When I began working on these flanged, ruffled, welted shams, I way overestimated my machine's ability to sew through so many layers.
Count the layers: sham front, front lining, sham back; flange front, fusible batting, flange back; self-lined ruffle at 3x fullness; and...... that lip cord. 
Long story short: it was impossible to sew all those layers together.  My only option was to take the lip off of the cord, and hand-sew it after assembling the shams without it.  The problem was that this sort of lip cord cannot be woven back together as some can.  The fill is covered in a woven sheath, and the ribbon and cord are braided around it.
I took apart enough ribbon to make woven "bandaids."  Double-sided tape on a small square of fabric provided the base. 
The three colors of ribbon were woven onto the adhesive, then trimmed and folded into a cover for the loose ends.
It's pretty cool!
The seam was opened enough to slip the bandaid in.
The cord was taped at each end....
Then taped together....
The bandaid was wrapped around the cord and tucked back into the seam, which had to be sewn shut again, by hand, through all the original layers plus the bandaid with its adhesive- thank goodness they were done at that point!
By the way, the pieced pillow in front of the shams: fully lined and serged, and pieced on both sides.